Connecting a stove pipe to a wood stove might sound like a task best left to the pros, but it’s simpler than you think—and way more satisfying than assembling IKEA furniture. With the right tools and a little know-how, anyone can tackle this DIY project and enjoy the cozy warmth of a crackling fire in no time.
Table of Contents
ToggleUnderstanding Wood Stove Stove Pipe Installation
Connecting the stove pipe to a wood stove is crucial for safe and efficient operation. Understanding the installation process ensures optimal performance and enhances safety in the home.
Importance of Proper Installation
Proper installation significantly affects how the wood stove functions. A correctly fitted stove pipe prevents smoke leakage, ensuring that all emissions vent outside. It also minimizes the risk of chimney fires caused by creosote buildup. Achieving the right angle and height for the pipe matters for efficient draft. Problems with installation lead to poor performance or increased safety hazards. Ensuring a secure fit eliminates gaps that could allow dangerous gases to enter living areas.
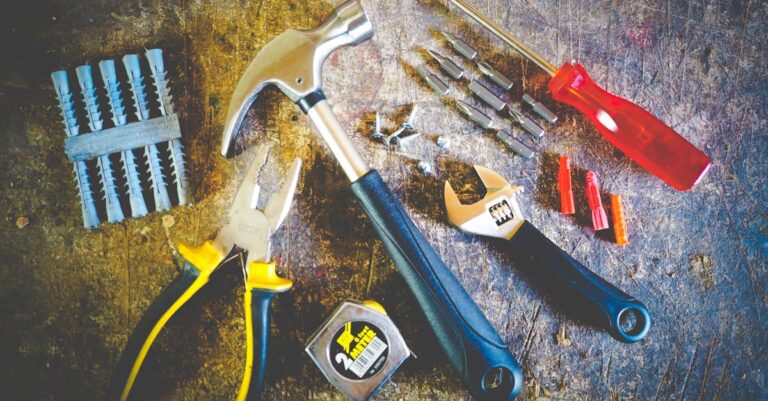
Tools and Materials Needed
Gathering the right tools makes the installation process smoother. Essential tools include a drill for fastening components, a level for alignment, and tin snips for cutting pipe sections. A measuring tape ensures appropriate lengths of stovepipe. Materials like triple-wall chimney pipe, stovepipe supports, and fire-resistant sealant are necessary for safety. Use screws and clamps designed for stovepipe to secure connections. Having all materials on hand prevents delays during installation, keeping the project efficient and hassle-free.
Preparing for Installation
Preparation sets the stage for a successful stove pipe installation. Taking proper steps ensures safety and efficiency throughout the process.
Safety Precautions
Safety remains a top priority during installation. Use a sturdy ladder if accessing the roof is necessary. Wear gloves to protect hands from sharp edges on the pipe. Always work in a well-ventilated area to prevent any risk of inhaling harmful fumes. It’s crucial to have a fire extinguisher nearby; this equipment can address emergencies quickly. Verify that all tools, including the drill, appear in good condition before use. Following these precautions minimizes hazards, making the task safer and more manageable.
Selecting the Right Stove Pipe
Choosing the correct stove pipe directly impacts performance. Consider double-wall pipes for better insulation and reduced heat loss. Select materials that conform to local building codes, often requiring stainless steel or galvanized steel. Measure the stove’s flue outlet diameter accurately; this step ensures a proper fit. Avoid using improperly sized pipes, since they can cause inefficiencies or hazardous conditions. Think about the pipe’s length and flexibility; longer runs require more support and stronger materials. Prioritizing these aspects leads to optimal performance of the wood stove.
Step-by-Step Installation Process
Connecting a stove pipe to a wood stove involves several precise steps. Following these guidelines ensures safety and efficiency.
Connecting the Stove Pipe to the Wood Stove
Start by positioning the wood stove in the desired location. Align the stove pipe’s diameter with the flue outlet of the stove. Insert the pipe into the outlet, ensuring a snug fit. Adjust the pipe for an angle that minimizes bends, aiming for a straight vertical path wherever possible. Secure the connection using screws specifically designed for stovepipe installations.
Sealing and Securing Connections
Next, provide additional security by sealing all joints. Use high-temperature silicone sealant for a tight, smoke-proof closure. Check that the screws are tight, as loose connections can lead to dangerous smoke leakage. Inspect and tighten joints after installation to maintain efficiency and safety over time.
Venting Requirements
Venting plays a crucial role in the wood stove’s performance. Ensure the stove pipe extends outside the structure, at least 3 feet above the roof to prevent downdrafts. Maintain a minimum clearance of 18 inches from combustible materials. Follow local building codes regarding vertical and horizontal vent lengths. Each installation must consider these venting specifications to ensure proper air flow and comfort.
Common Issues and Troubleshooting
Addressing common issues during installation ensures safety and efficiency. Troubleshooting these problems can enhance the performance of a wood stove.
Poor Draft and Smoke Problems
Poor draft creates challenges for proper stove operation. Factors contributing to poor draft include excessive bends in the stovepipe or an incorrect height above the roofline. If smoke fills the room, it signals potential blockage or improper connection in the system. Correctly positioning the stove to achieve a straight stovepipe helps improve airflow. Regular inspection of the chimney cap prevents obstructions like soot and debris buildup. Ensuring compatibility between the stove and flue outlet diameter also plays a crucial role in maintaining a good draft.
Leaks and Gaps
Leaks and gaps compromise both safety and efficiency during operation. Unsealed joints can allow smoke to escape into living areas, creating hazardous conditions. Sealing the stovepipe connections with high-temperature silicone effectively prevents leakage. Routine inspections of all connections and seals ensure they remain secure over time. Employing the correct screws for fastening joints reduces the risk of gaps forming. Maintaining proper clearances from combustible materials also helps in minimizing risks associated with leaks.
Successfully connecting a stove pipe to a wood stove not only enhances home comfort but also ensures safety and efficiency. With the right tools and adherence to safety precautions, anyone can tackle this project. The satisfaction of completing the installation brings warmth and a sense of accomplishment.
Regular maintenance and inspections are crucial for optimal performance. By following guidelines for proper sealing and ensuring clearances from combustible materials, homeowners can enjoy their wood stove with peace of mind. Embracing this DIY task opens the door to cozy evenings by the fire, making it a worthwhile endeavor.